Mac Basics Tutorial: Spaces, Exposé, Quick Look
Mac OS X has tons of features for organizing, sorting and searching through all the data. These functionalities are based on propriety technologies such as Spaces, Exposé, Quick Look. With a bit of practice, you’ll be able to work, find files, open or delete them faster than ever.
Contents
How to Use Multiple Desktops (or Spaces) on a Mac [Video]
Video uploaded by Tech Talk America on July 8, 2015
How to Organize Work By Using Spaces
On Mac, Spaces is a virtual desktop feature which enables users to switch from one desktop area to another. Thus users can fit application windows in different spaces, making it easy to jump from one space to another. Assigning applications to specifying areas using the Spaces prevents you from wasting time looking through multiple desktop area.
If you use Spaces, you should assign applications to different screens, so they always open in the same area, because if not, you could lose applications and windows across multiple desktops available. You could group your spaces by type of application and use shortcuts or application icon in the Dock to move to the space you need.
You can line up your Dock icons from left to right, according to the space they are in, and then use Dock dividers to match up the Dock with spaces.
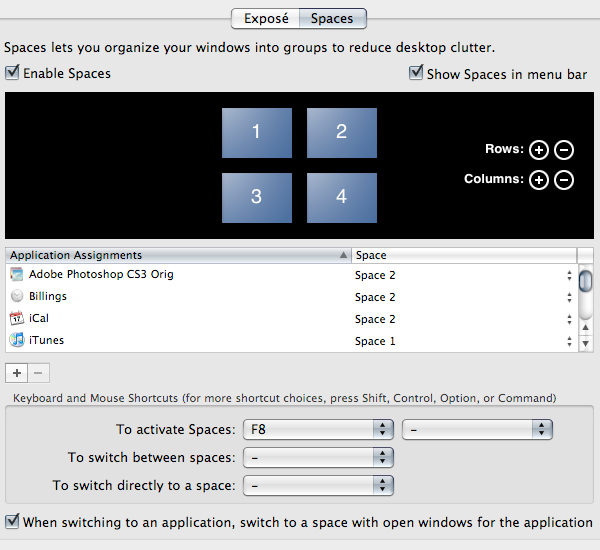
To assign applications to spaces you use the Exposé & Spaces pane in System Preferences. To get to that pane, choose Apple System Preferences, clicking Exposé & Spaces, and the clicking the Spaces tab. In the top of the window, a visual layout of the number of spaces available will be displayed. It would be better if you to stick with four spaces available by default. You can always build up more Spaces (up to 16) as you become more familiar with the Spaces feature.
- Open the apps you use frequently.
- Click the Add (+) icon below the Application Assignment list.
- When a drop-down menu appears, it will show all the open apps.
- Choose the app you want to add to the Application Assignment list.
- Use the drop-down menu to the right of the application to assign it to a space.
- Note that you can add applications that aren’t running by choosing Other from the drop-down menu that appears when you click the Add (+) icon.
Now, whenever you use an app, it opens in that space.
You can get an overview of all the screens used by clicking the Spaces icon in the Dock or by opening Spaces in the Applications folder. You can also press F8 to get the same result. You can move between Spaces by using Ctrl and the arrow keys.

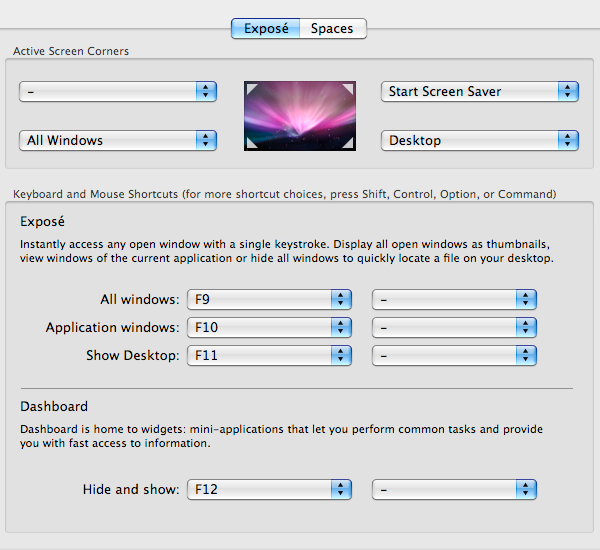
Exposé technology enables users to get a quick overview of every window. Most of Apple keyboards have an Exposé button, which shares the F3 key. Users can press it to zoom out and display all the windows in a grid. In this case, active windows appear in the top, while minimized windows appear smaller, below a faint dividing line near the bottom.
Note that hidden windows don’t appear in Exposé even if they’re performing a function, such as iTunes playing music, and so on.
The latest Mac OS enable users to get an Exposé view of the window from a single app. To do this, click and hold any application icon in the Dock.
To clear all the windows and display just the desktop while opening Exposé, hold down the ᴂ key.
It’s easy to drag items from one application to another quickly and easily with Exposé. If you are dragging an item in Finder and are going to use it in an app that’s hidden, you can drag the item to the application icon in the Dock, and then hold it over the icon to use Exposé to display all the windows. Next drag the item to the window of the application you want to use and press the spacebar. That window will be displayed in the foreground, and you’ll be able to drop the item straight into it.
It’s easy to combine Spaces with Exposé to get a complete overview of every window that Mac OS X is using.

How to Use Quick Look and Spy Inside Files
Quick Look technology enables the user to quickly view the contents of a file without having to open a program. This feature works even with video and music files, and the content is displayed in a small transparent window.
Many experts recommend using Quick Look instead of opening programs to check the contents of a file. It is possible to access Quick Look through the menu bar or by right-clicking and choosing Quick Look. The easiest way is however to select a file and press the spacebar.
You can put a Finder window into Cover Flow mode by choosing View – As Cover Flow. You can then use the arrow keys to move through files. You can also press the spacebar to use Quick Look to expand a file and view its contents.
Links
- Use Mission Control on your Mac – Apple Support
- Sell your used Apple gadget to iGotOffer now! We offer the highest price online for your used Apple electronics! Free instant quote, free fully insured shipping, fast payment: Sell your old Apple Mac now!
- Read our blog, where you can learn more about all aspects related to the consumer electronics and more: iGotOffer Blog.

Thanks, helps a lot. Expose is really important.