How to Troubleshooting iTunes on Your Mac
There are a few problems you may encounter when trying to run iTunes on your Mac, and our list of troubleshooting tips can help.
Contents
- 1 Troubleshooting iTunes on Mac [Video]
- 2 Troubleshooting iTunes on Mac
- 2.1 If the iPhone Is Linked to Another iTunes Library
- 2.2 Eject a Lost CD
- 2.3 You Do Not Have Enough Access Privileges When Importing Songs
- 2.4 Audio Stops When iTunes Starts Playing Another Song
- 2.5 iTunes Gives the Warning You Are Out of Hard-Disk Space on the Mac
- 2.6 To search for the new folders created in your library
- 3 Links
Troubleshooting iTunes on Mac [Video]
Video published by iGotOffer on January 17, 2018
Troubleshooting iTunes on Mac
If the iPhone Is Linked to Another iTunes Library
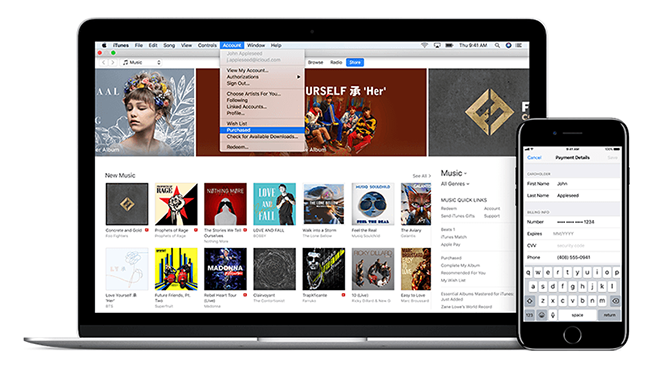
iTunes may display the message “The iPhone (followed by the iPhone’s name) is linked to another iTunes library”. In this case, it is possible that you have plugged in the wrong iPhone. The dialog box will offer to change this device’s allegiance from the current computer this iPhone is linked to, to the Mac you are using. If you do not want to change the computer, click “No”, and check which iPhone you are using before synchronizing it.
Eject a Lost CD
If you are using a CD or DVD, sometimes your Mac OS X may lose track of them after attempting to eject the disc. If the eject mechanism fails to get a grip on the CD and push it out, but the command has been executed, the Mac believes it has ejected the CD, even though the disc is still in the drive.
When this happens, it is unlikely that you will be able to eject the CD or DVD by issuing another eject command from iTunes, but it is worth trying that first. If that attempt doesn’t work, use Disk Utility to eject the “lost disk”. To do so, follow these steps:
- Press Command – Shift – U or choose Go – Utilities from the Finder menu to display the Utilities folder.
- Next, double-click the Disk Utility item to run it.
- Select the icon for the CD drive or the CD itself in the list box.
- Now, hit the Eject button.
- Press Command-Q or choose Disk Utility – Quit Disk Utility to quit Disk Utility.
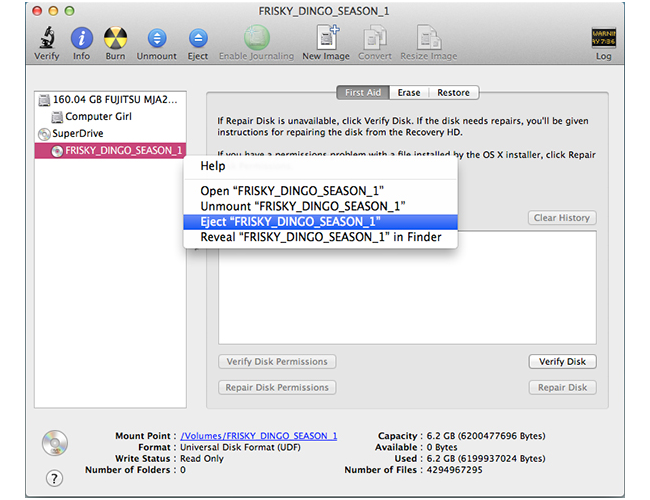
If that doesn’t work, you may need to force your Mac to recognize the drive. If it is an external drive, such as FireWire or USB, try unplugging the drive, waiting a minute, and then plugging it back in. If the drive is an internal drive, you may need to restart your Mac to force it to recognize the drive.
If the disc is still stuck in your Mac’s internal optical drive, follow as many of these steps as necessary to eject it:
- Restart your Mac. If it can’t be restarted normally, gently press the Reset button, if your Mac has one, or press the combination Command-Ctrl-Power. As soon as you hear the system startup sound, hold down the mouse button and wait until your Mac finishes booting. With any luck, this operation may eject the disc.
- Now, restart your machine again. At the system startup sound, hold down the combination of four keys – Command-Option-O-F – to boot the device to the Open Firmware mode.
- Next, type eject CD and press return. If this was successful, the CD drive will open, but if not, you may see the message “Read of block failed. Can’t OPEN the Eject device.” In either scenario, you will now need to type mac-boot and press Return to reboot your Mac.
If the Open Firmware mode cannot fix the problem, the only solution is to take your Mac in to a service shop.
You Do Not Have Enough Access Privileges When Importing Songs
Sometimes you will see the message, “Error occurred while converting the file (followed by the name of the file). You do not have enough access privileges for this operation”.
This may occur when you have moved the iTunes media folder to a shared location, but you don’t have Write permission. The administrator can easily fix this issue by assigning Write permission for the iTunes Media folder to whoever received this error.
Audio Stops When iTunes Starts Playing Another Song
Sometimes when iTunes switches to another song, the audio will stop.
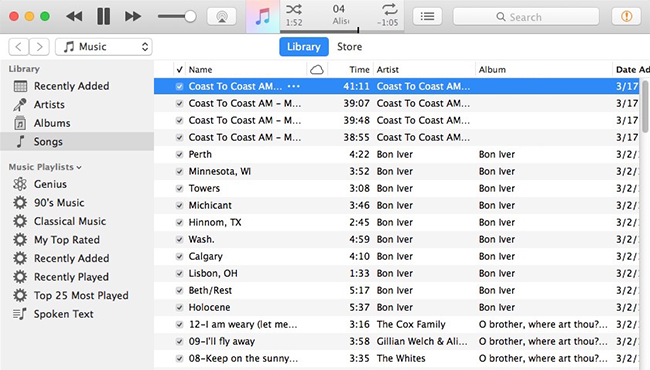
The lack of sound usually suggests that there’s something wrong with the song file. Start by double-clicking the song to restart it, and with any luck, you will hear the song. You can also press Command-L, or choose View-Go To Current Song, to display the song you are listening to, then double-click it. If restarting the song doesn’t start the audio again, just restart iTunes.
iTunes Gives the Warning You Are Out of Hard-Disk Space on the Mac
If you choose to add files to your library, iTunes can copy them to your library folder and you will have all your files stored in one place. Storing your files in the iTunes library is convenient, as your MacBook’s hard disk will contain copies of all the audio and video files stored on network drives, so you and your loved ones will be able to enjoy them when your computer is not connected to the global network. Note that in the end, all the files accumulated can be more voluminous and need more disk space than is available on your Mac’s hard disk. Also note that if you store these files on your hard drive, but use folders other than your library folder, you can try one of these options:
- You can choose the option File-Library-Organize Library. Once there, select the Consolidate Files check box. In that box click the OK button, and iTunes will obediently copy files to your library. However, keep in mind that this option doubles the amount of space the files will use on drive. This isn’t usually the best choice, but some users may want copies of these files in their library.
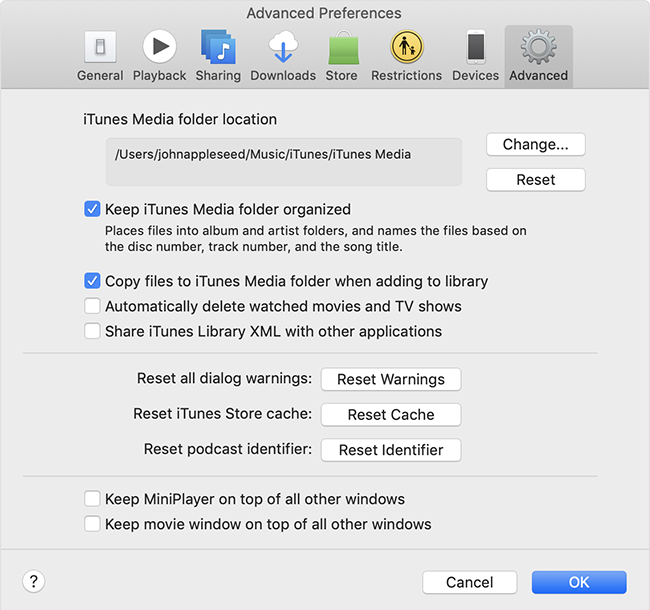
- Another option is to have iTunes store references to the files, rather than store copies of them. If the files you need to store are in your library folder, this may be the easiest solution. Just clear the “Copy Files To iTunes Media Folder When Adding To Library” check box on the Advanced tab in the Preferences dialog box.
- The final option is to move your library to the folder that contains your preferred files. This is the most convenient solution if the library doesn’t contain any files.
Note that when you choose to consolidate your library, but your Mac doesn’t have enough disk space, iTunes will display the following message to alert you to the problem: There is not enough room on Macintosh HD to copy all of the requested files.
If you see this message, click the OK button to dismiss this message box, as this is your only option. When you click OK, iTunes will then try to copy all the files.
You will want to stop the copying process as soon as you can. To stop the process, quit iTunes by pressing Command-Q or by choosing iTunes – Quit iTunes. If you can’t quit iTunes gently, force quit by clicking the iTunes icon in the Dock, and then choose Force Quit from the shortcut menu. If this fails, press Command – Option – Esc, to display the Force Quit dialog box. Next click the entry for iTunes, and then click the Force Quit button.
Once you have done this, remove the files you have just copied to your library from the folder. Unfortunately, Mac OS X maintains the Date Created Information from the original files on the copies made by the consolidation, so you can’t search for the files by date created on the Mac like you can on Windows.
Your best bet is to search by date created to identify the folders that iTunes has just created in your library folder so that you can delete them and their contents. This search will find all of the consolidated songs and videos that iTunes put into folders that already existed in your library.
For example, let’s assume that the song file Summertime Sadness.m4a has been stored in your well-organized library with all the correct tags. In this case, your library will contain a Lana Del Rey folder. Suppose that you would then like to consolidate your “disciplined” library so that other songs from Lana’s album are copied there. In this case, the files you want in your library will go straight into the existing folder. Consequently, your search will change to the date of the consolidation. You will need to drill down into each modified folder to find the files added to that folder.
To search for the new folders created in your library
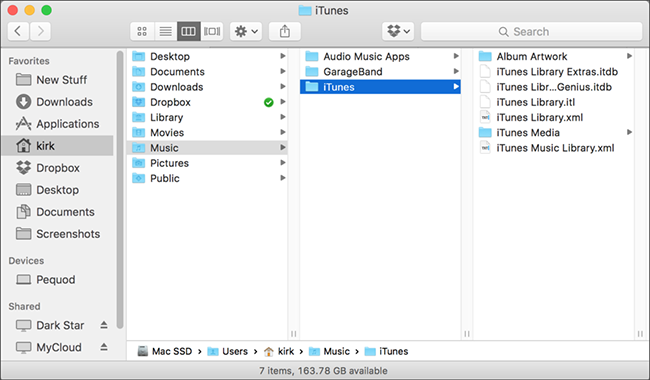
- Open a Finder window and head to the folder containing your iTunes Media folder. To do so, click the Finder icon in the Column View on the Dock. Next, find and hit the Music item in the Sidebar. Now, proceed to the iTunes folder. Once in that folder, click the iTunes Media folder. If you are not sure about the folder you are in, go to the Advanced tab in the iTunes Preferences dialog box to find your answers.
- Now, press the Command-F combination. You can also choose the File – Find option to display the Search bar.
- Then, click the iTunes Media button to tell Mac OS X that it should search in that folder.
- Look for the top search line, and choose Find: Folders. Continue to the second search line, and choose Created Date Is Today. Now, Mac OS X will search for folders created today and display a list.
You can sort the folders by date created, and identify those created during the consolidation by the time on the date. Then you can delete them.
Some experts recommend verifying that the Trash contains no other files you may care about later, and then emptying the Trash just to get rid of the surplus files.
Remember that after deleting the files, you will need to remove the references from iTunes and add them again from their previous location before iTunes can play them. If iTunes discovers that it can’t find a file where it is supposed to be, it reacts with surprise and displays an exclamation point in the first column. To fix this, simply delete all the files with exclamation points, then add the same file to your library again.
Links
- iTunes – Official Apple Support
- Start selling! Purchase your new stuff cheaper by having the old ones monetized! Check our prices for your old electronics that are collecting dust on the shelves. Sell your used MacBook now! Free instant quote, free fully insured shipping, fast and secure payment.

Comments
So empty here ... leave a comment!